

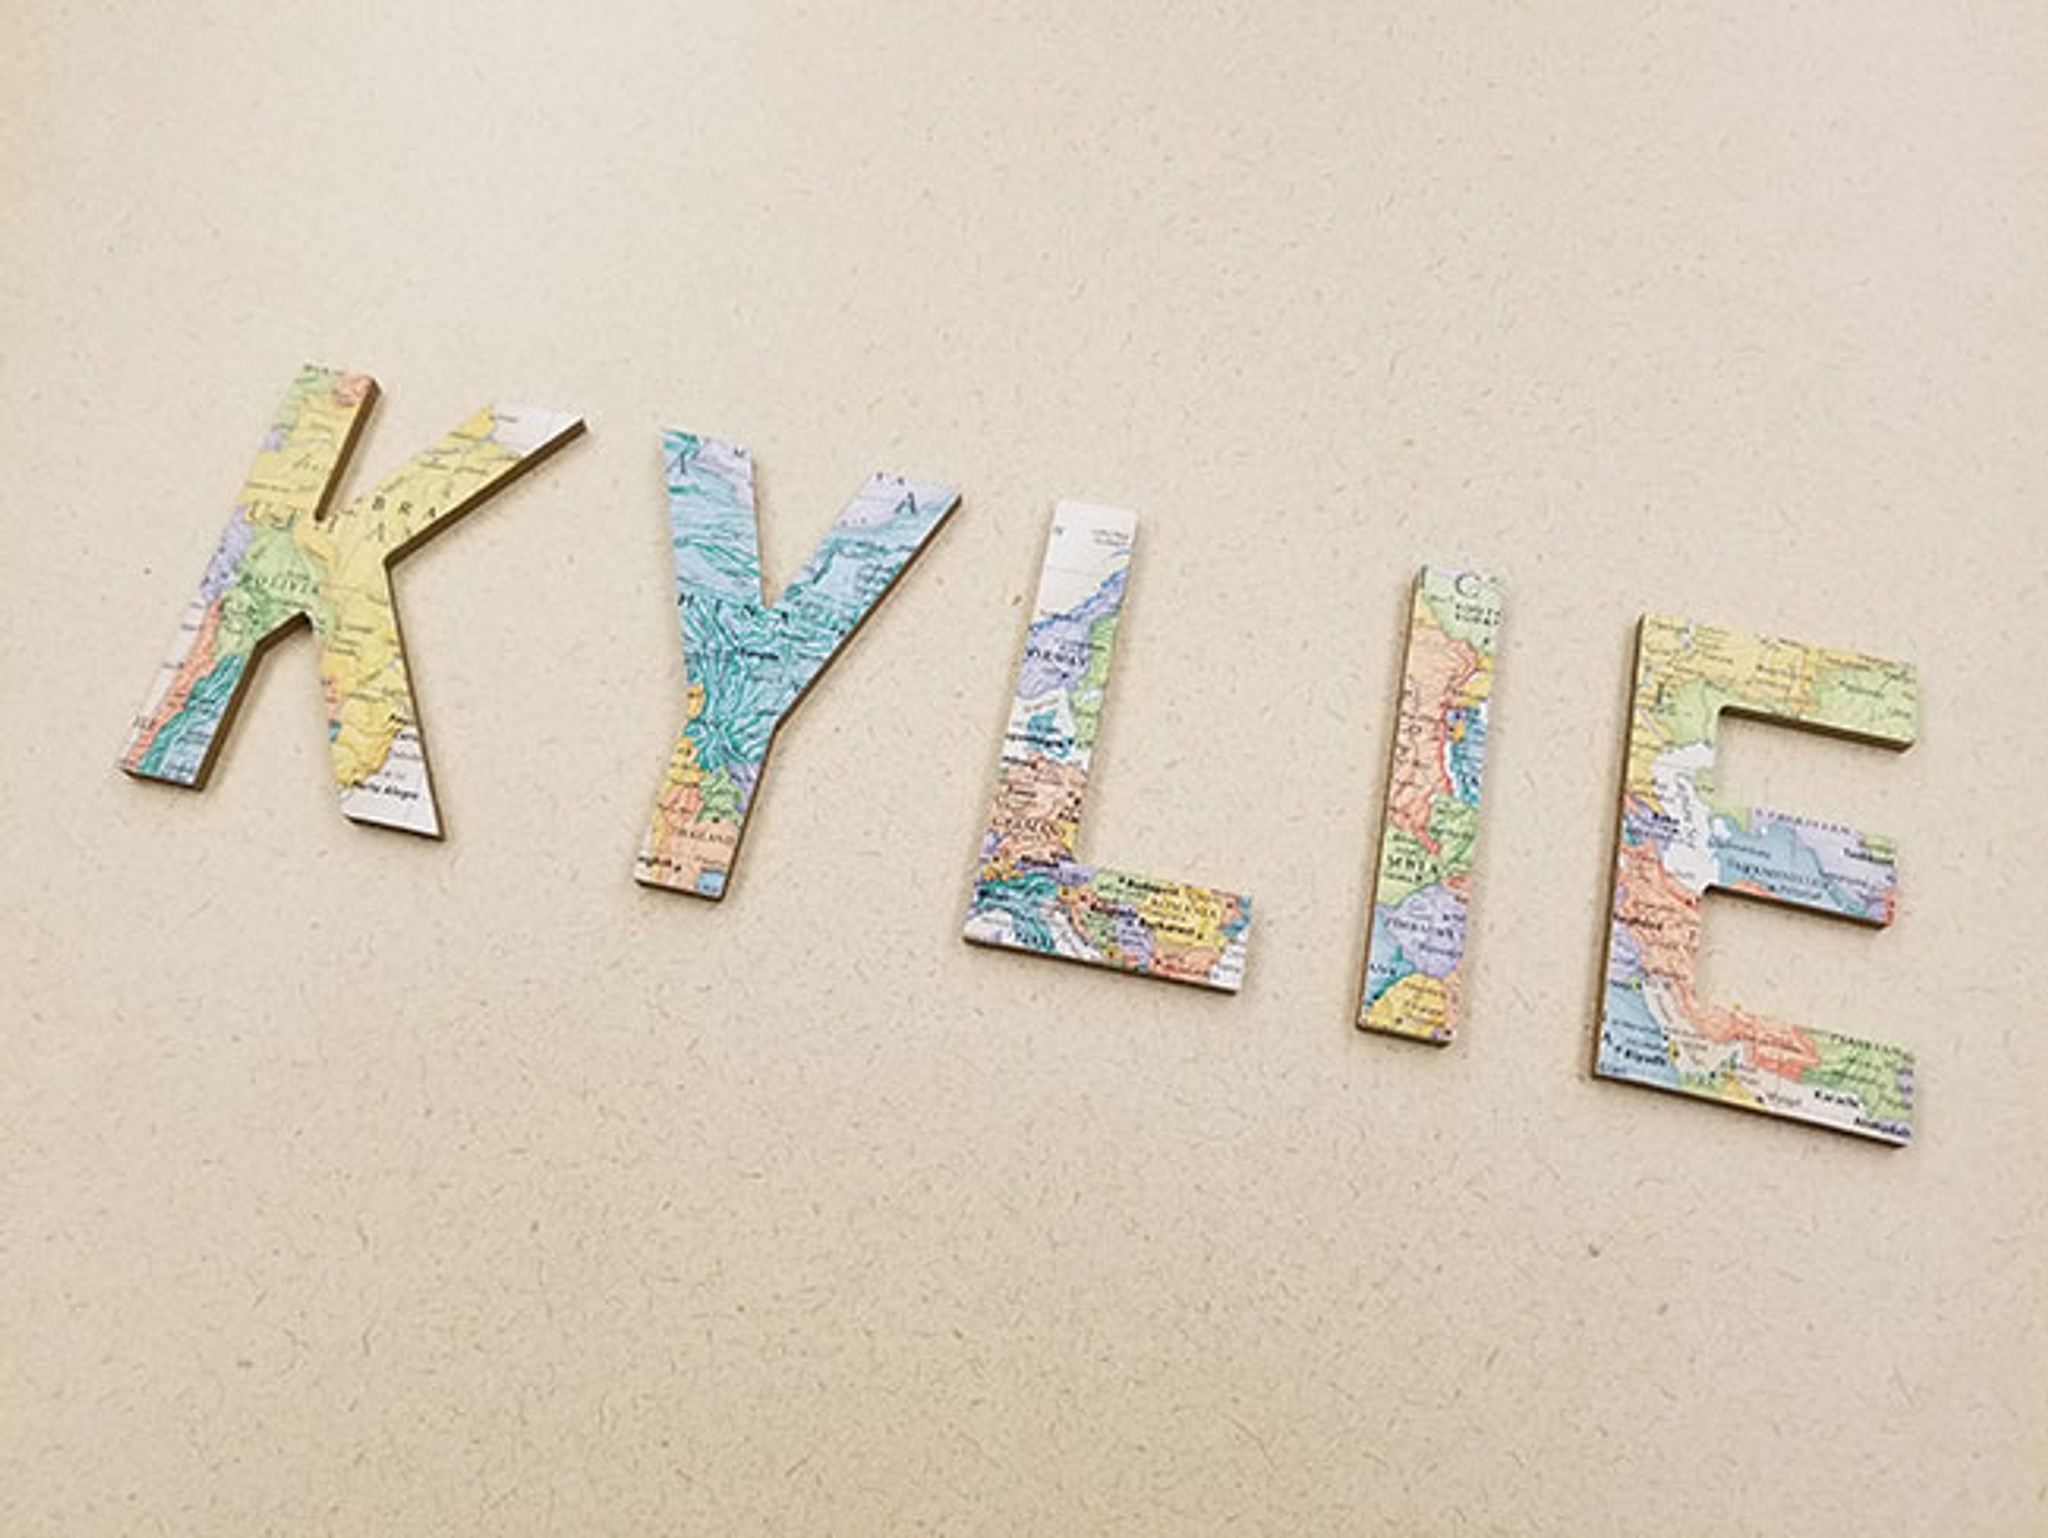
Map Crafts: DIY Decorative Letters
Decorative letters are a great way to enhance the décor of any room or celebration. Plus, they are rather easy to make! While you can decorate letters with any type of paper or poster-like items, covering them with maps is a great way to utilize old maps or atlases, as well as add a sense of adventure to your interior design. Here’s how to craft these adorable map letters:
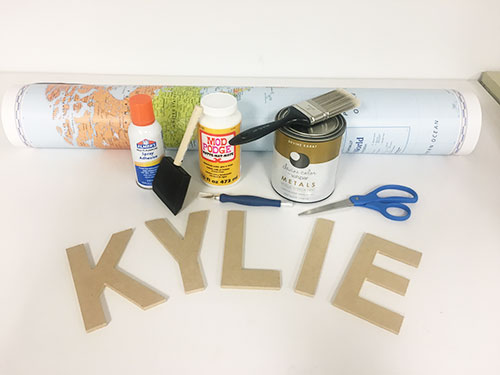
Ingredients:
- Wooden letters, any size—The ones we used for this tutorial are about 5.5 inches in length and a ¼ inch thick
- Gold paint—Any kind that will paint on wood
- Small paint brush or sponge brush
- Spray adhesive
- Xacto knife
- ModPodge
- Larger paint brush
- Map, size depending on the amount of letters used
- Scissors
Instructions:
Step 1: Prepare Your Work Station
Gather all of the supplies listed above and prepare your work station. You’ll want a large flat surface, covered with a tarp or plastic table cover to prevent spills and stains. You’ll also want a surface you can cut on with a xacto knife, whether that means placing a cutting board at your work space during the appropriate steps.
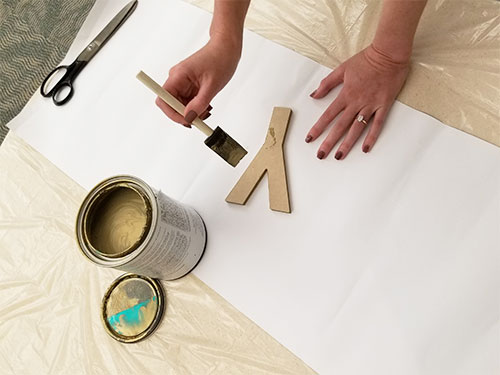
Step 2: Paint the Letters
Begin your craft by painting the quarter inch sides (and insides) of the letters with gold paint. Use the smaller paint brush or sponge brush to reach every crevice. Don’t worry about spreading paint onto the tops of the letters, as they will eventually be covered by the map.
Once you have finished painting the sides of all your letters, space them out on your flat surface to dry. Wait at least four hours to move onto the next step.
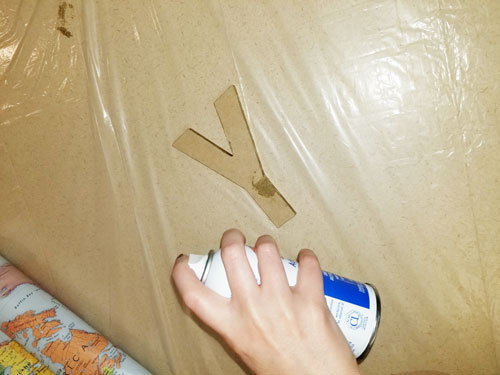
Step 3: Measure Your Map
After the paint on your letters has dried completely, set your map face down on your work station. Space out your letters face down where you want them, leaving at least three inches of space between each letter. Next, pick up a letter and spray the front side with adhesive, immediately putting it back face down and securing to the backside of the map. Continue with the remaining letters.
Once all of the letters have been sprayed with adhesive, take your xacto knife (or scissors—whichever you feel more comfortable with) and separate the letters, leaving excess map around each letter. This will make it easier to trace and cut each letter with the xacto knife in the following step.
Step 4: Cut out Your Letters
After the section of map glued to your letters is smaller and easier to manage, take your xacto knife and trace it along the edge of the wooden letter, cutting the map to fit the shape of the letter. Repeat this step with the remaining letters.
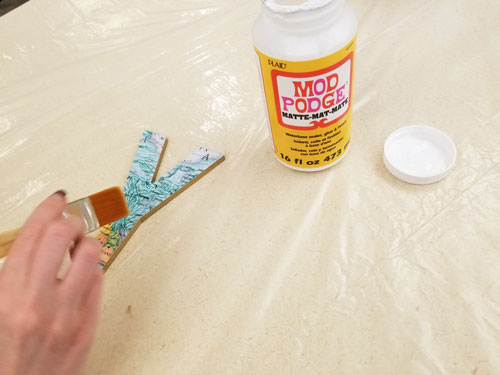
Step 5: Paste on ModPodge
Take your larger paint brush and layer a thick coating of ModPodge directly on top of the map pieces covering the wooden letters. Note that the map pieces will likely bubble due to the wetness of the glue, but this will straighten out as the glue dries.
Once each letter has a coating of ModPodge on it, leave the letters out to dry, preferably overnight. If it appears as if the letters need another coating of ModPodge once they are dry, feel free to add more.
Step 6: Decorate!
After the letters are dry, you are free to decorate! Set them against a wall as is or add hooks or magnets for other means of decorating.